Supabase
Introducció
You can use supabase-kt to interact with your Postgres database, listen to database changes, invoke Deno Edge Functions, build login and user management functionality, and manage large files.
To see supported Kotlin targets, check the corresponding module README on [GitHub](https://github.com/supabase-community/supabase-kt.
The Kotlin client library is created and maintained by the Supabase community, and is not an official library. Please be tolerant of areas where the library is still being developed, and — as with all the libraries — feel free to contribute wherever you find issues.
Project
Supabase Modules
Add one or more modules to your project depending on your needs.
The available modules are:
Check out the different READMEs for information about supported Kotlin targets.
Add Ktor Client Engine to each of your Kotlin targets.
Supabase Client
Independently of which Supabase module you are using, you will need to initialize the main client first and install the module.
To create a new client, you can use the createSupabaseClient function.
When installing a module, you can pass a block to configure it.
import io.github.cdimascio.dotenv.dotenv
import io.github.jan.supabase.auth.Auth
import io.github.jan.supabase.createSupabaseClient
import io.github.jan.supabase.postgrest.Postgrest

fun main() {

    val dotenv = dotenv()

    val supabase = createSupabaseClient(
        supabaseUrl = dotenv["URL"],
        supabaseKey = dotenv["KEY"]
    ) {
        install(Auth)
        install(Postgrest)
        //install(Storage)
    }
}
Got to the Supabase dashboard and copy your project’s URL and key.

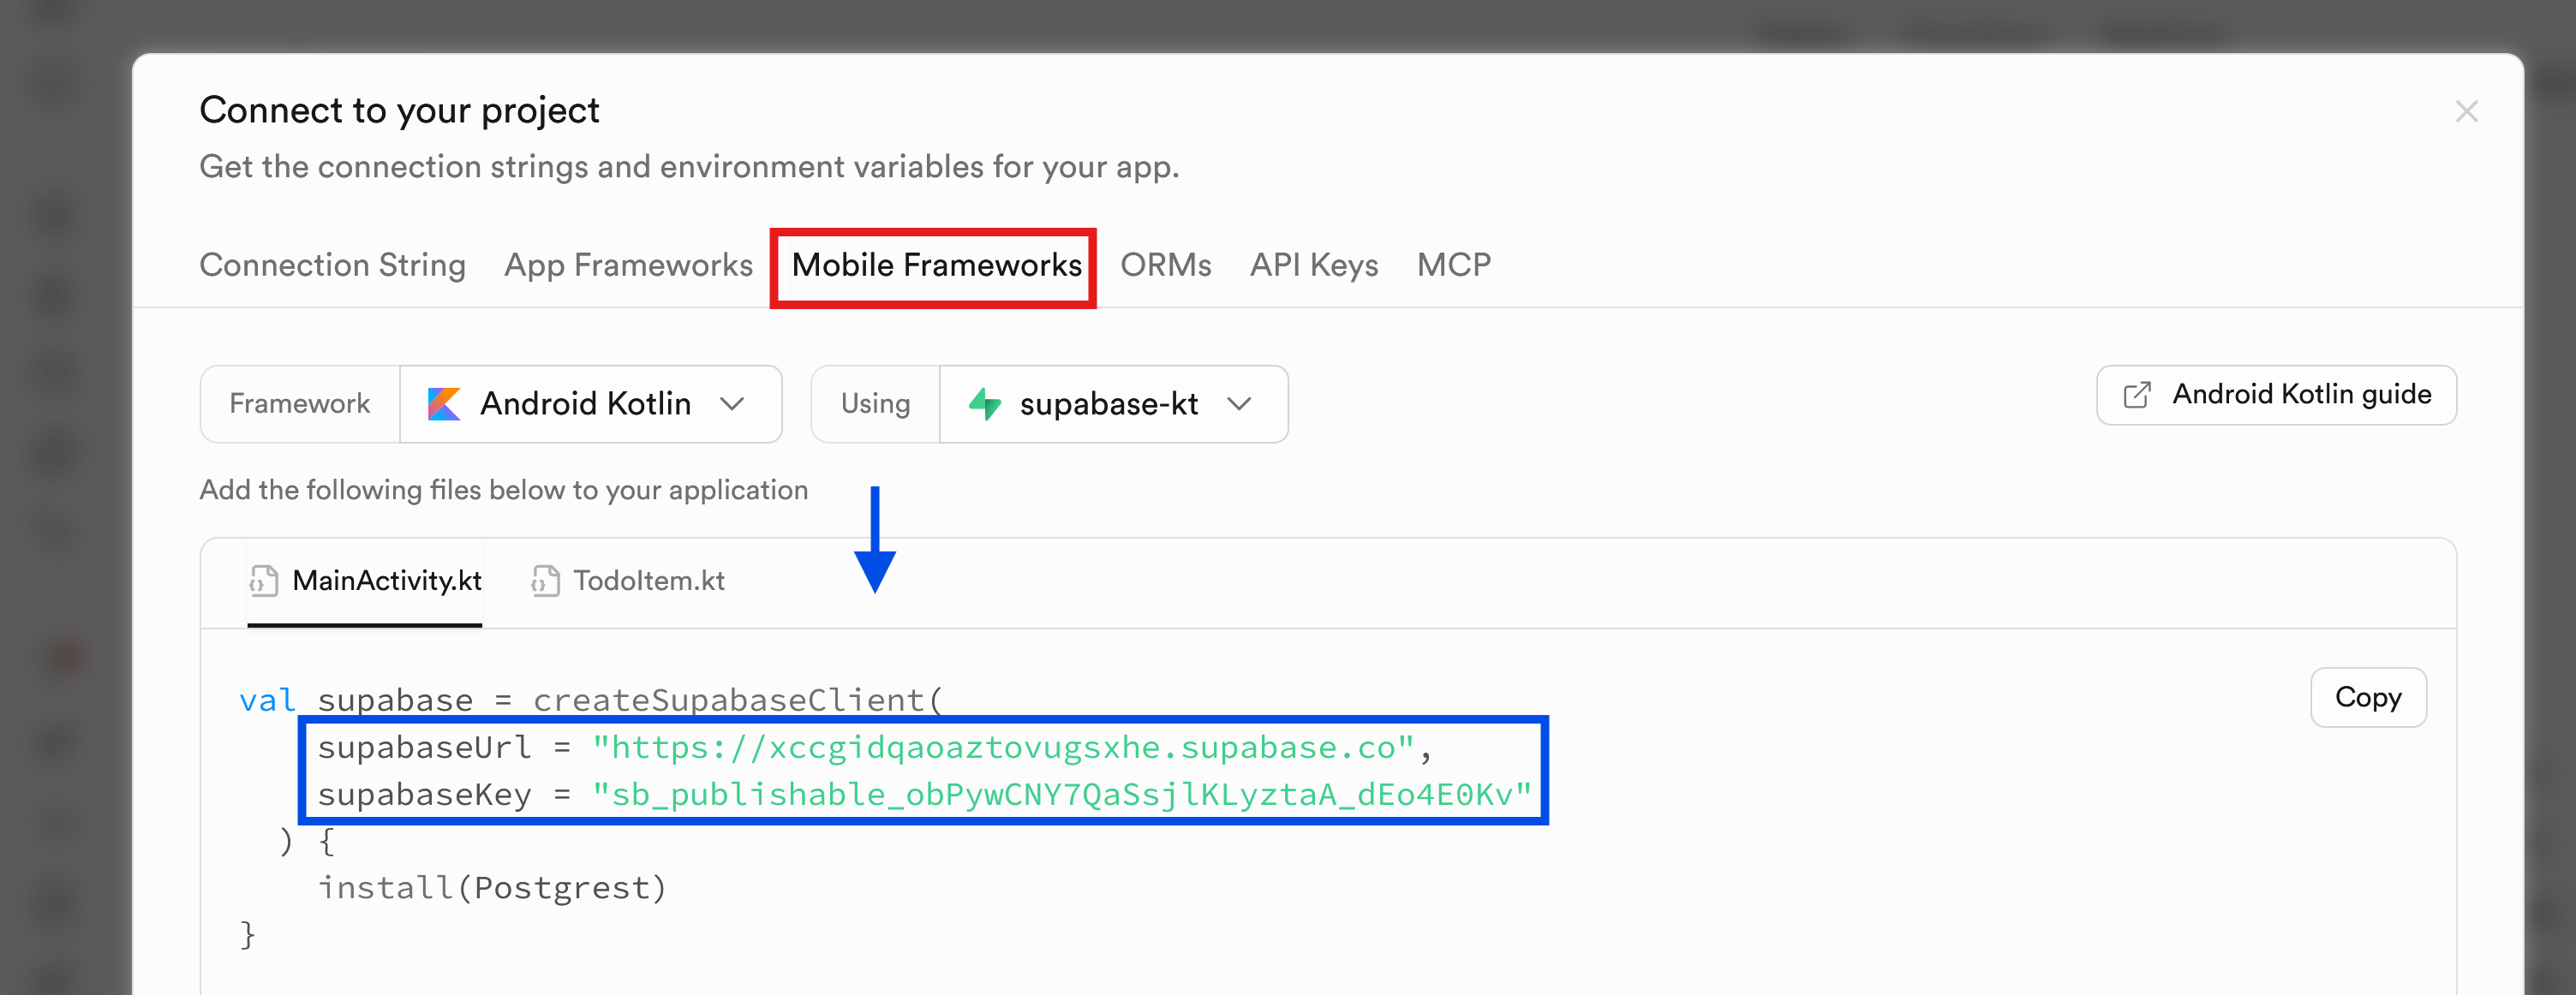
Test that the supabase client is working by running the code.
Database
Create a new table with the SQL Editor:
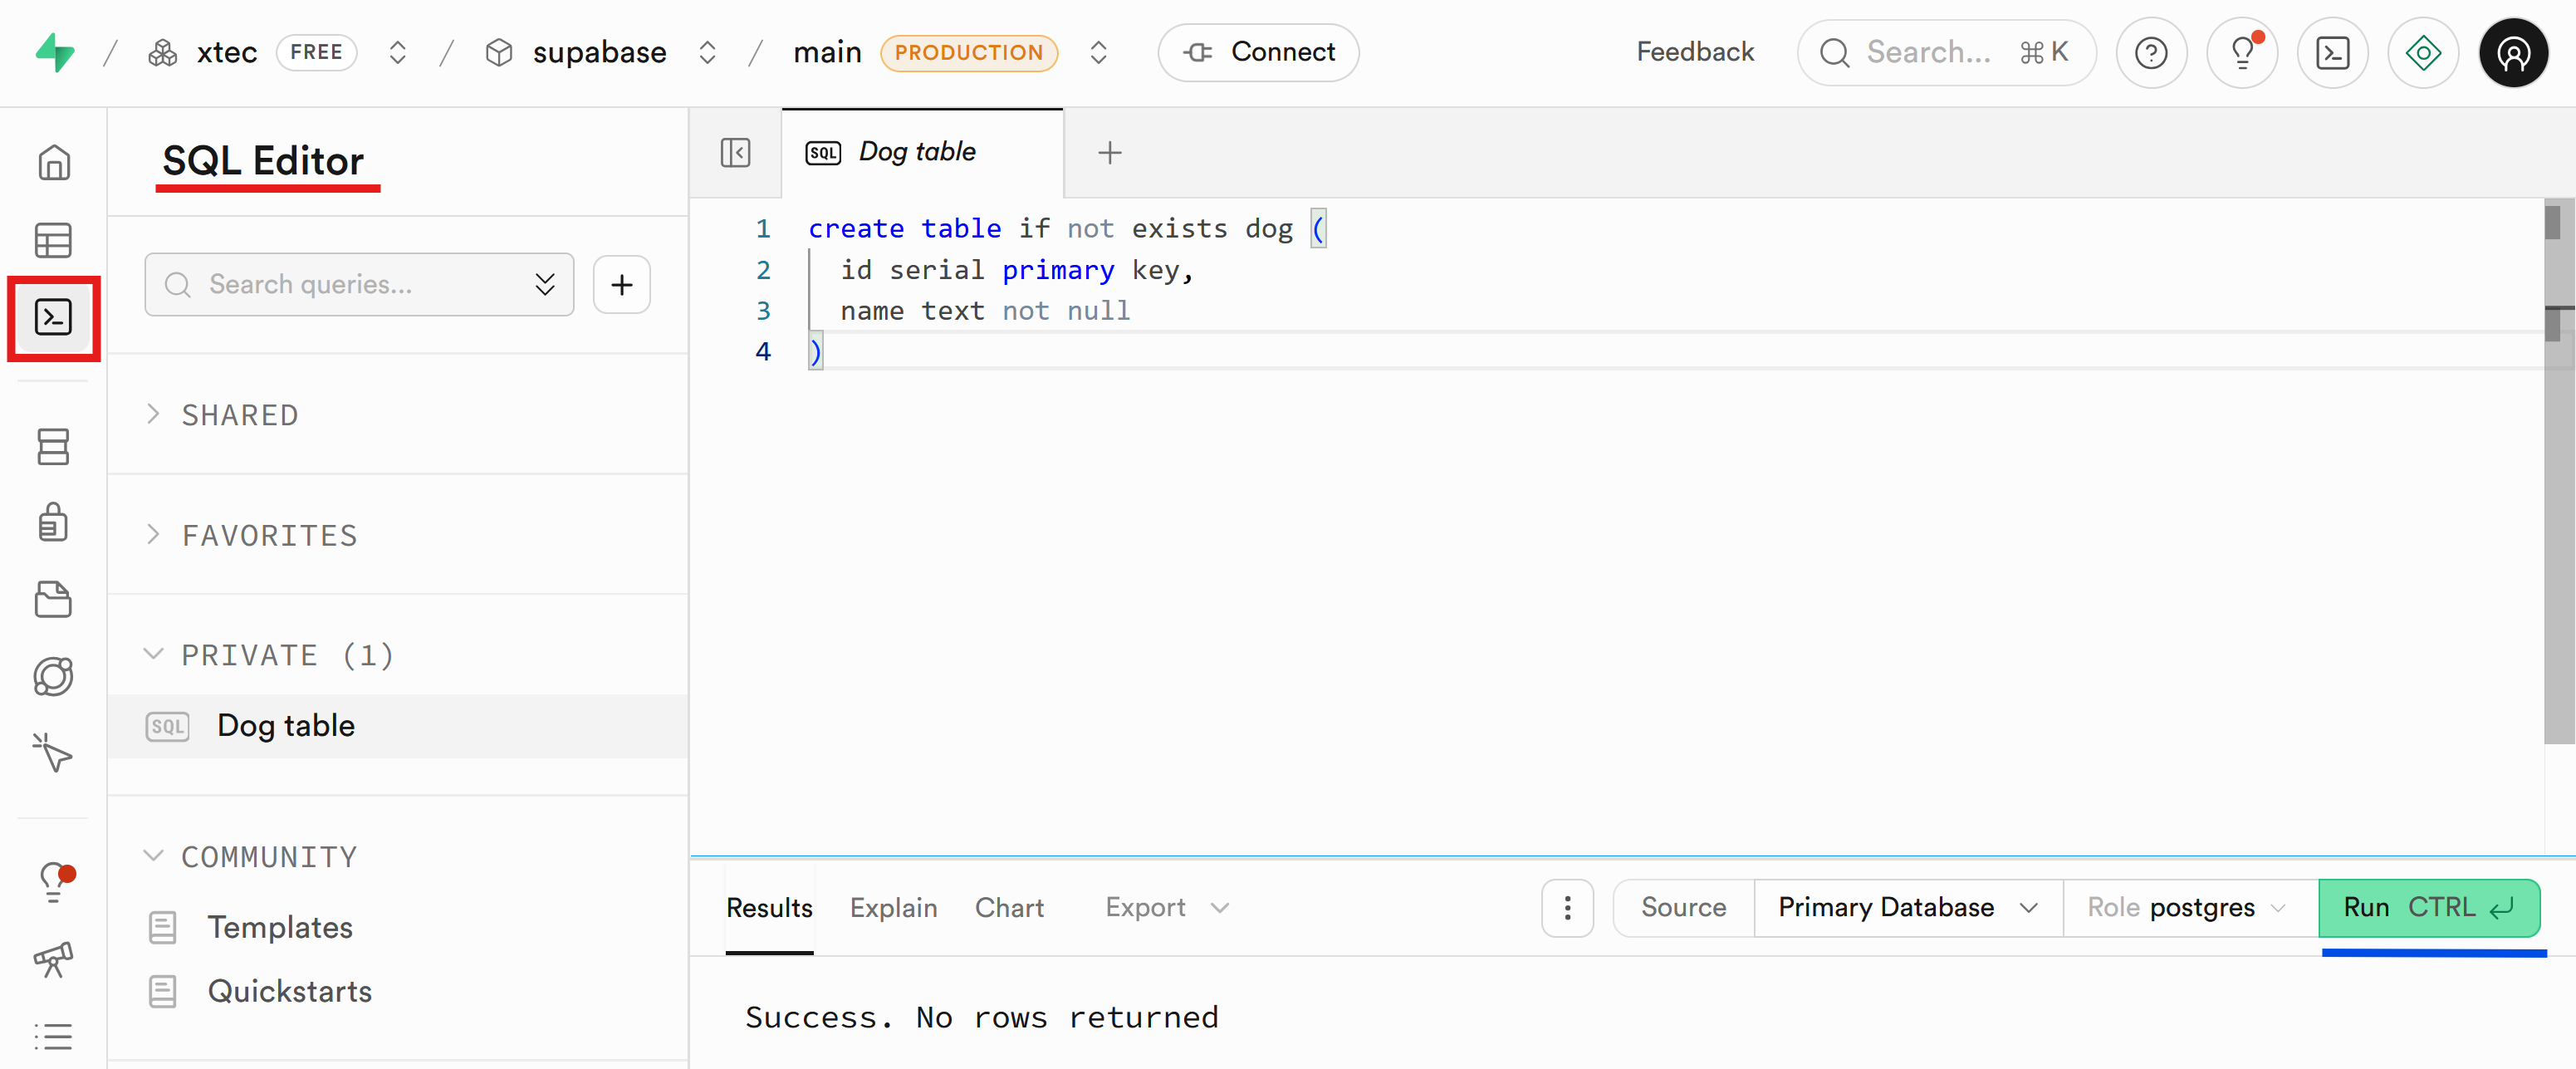
(
id serial primary key,
name text not null
)Estàs llegint una vista prèvia.
Inicia sessió per llegir la pàgina completa. L'alumnat i el professorat hi accedeixen amb el compte del Moodle del centre.
Inicia sessió