MongoDB
Introducció
Entorn de treball
Arranca la base de dades:
start-process -NoNewWindow mongod.exeCrea un projecte amb Bun:
mkdir monogdb
cd monogdb
bun init -y
Afegeix una dependència amb mongodb:
bun add mongodbObre el projecte amb WebStorm.
Inserir documents
You can insert a document into a collection using the collection.insertOne() method. To insert a
document, define an object that contains the fields and values that you want to store. If the specified
collection does not exist, the insertOne() method creates the collection.
Crea el fitxer fish.ts
A continuació, insereix un peix a la col·lecció fish de la base de dades ocean.
// fish.ts
// MongoDB deployment's connection string
// Create a new client and connect to MongoDB
try
// Connect to the "ocean" database and access its "fish" collection
// Delete all the fish from the collection
await
// Create a document to insert
// Insert the defined document into the "ocean" collection
// Print the ID of the inserted document
`A document was inserted with the _id: `
} finally // Close the MongoDB client connection
await
}Executa l’script per inserir el peix:
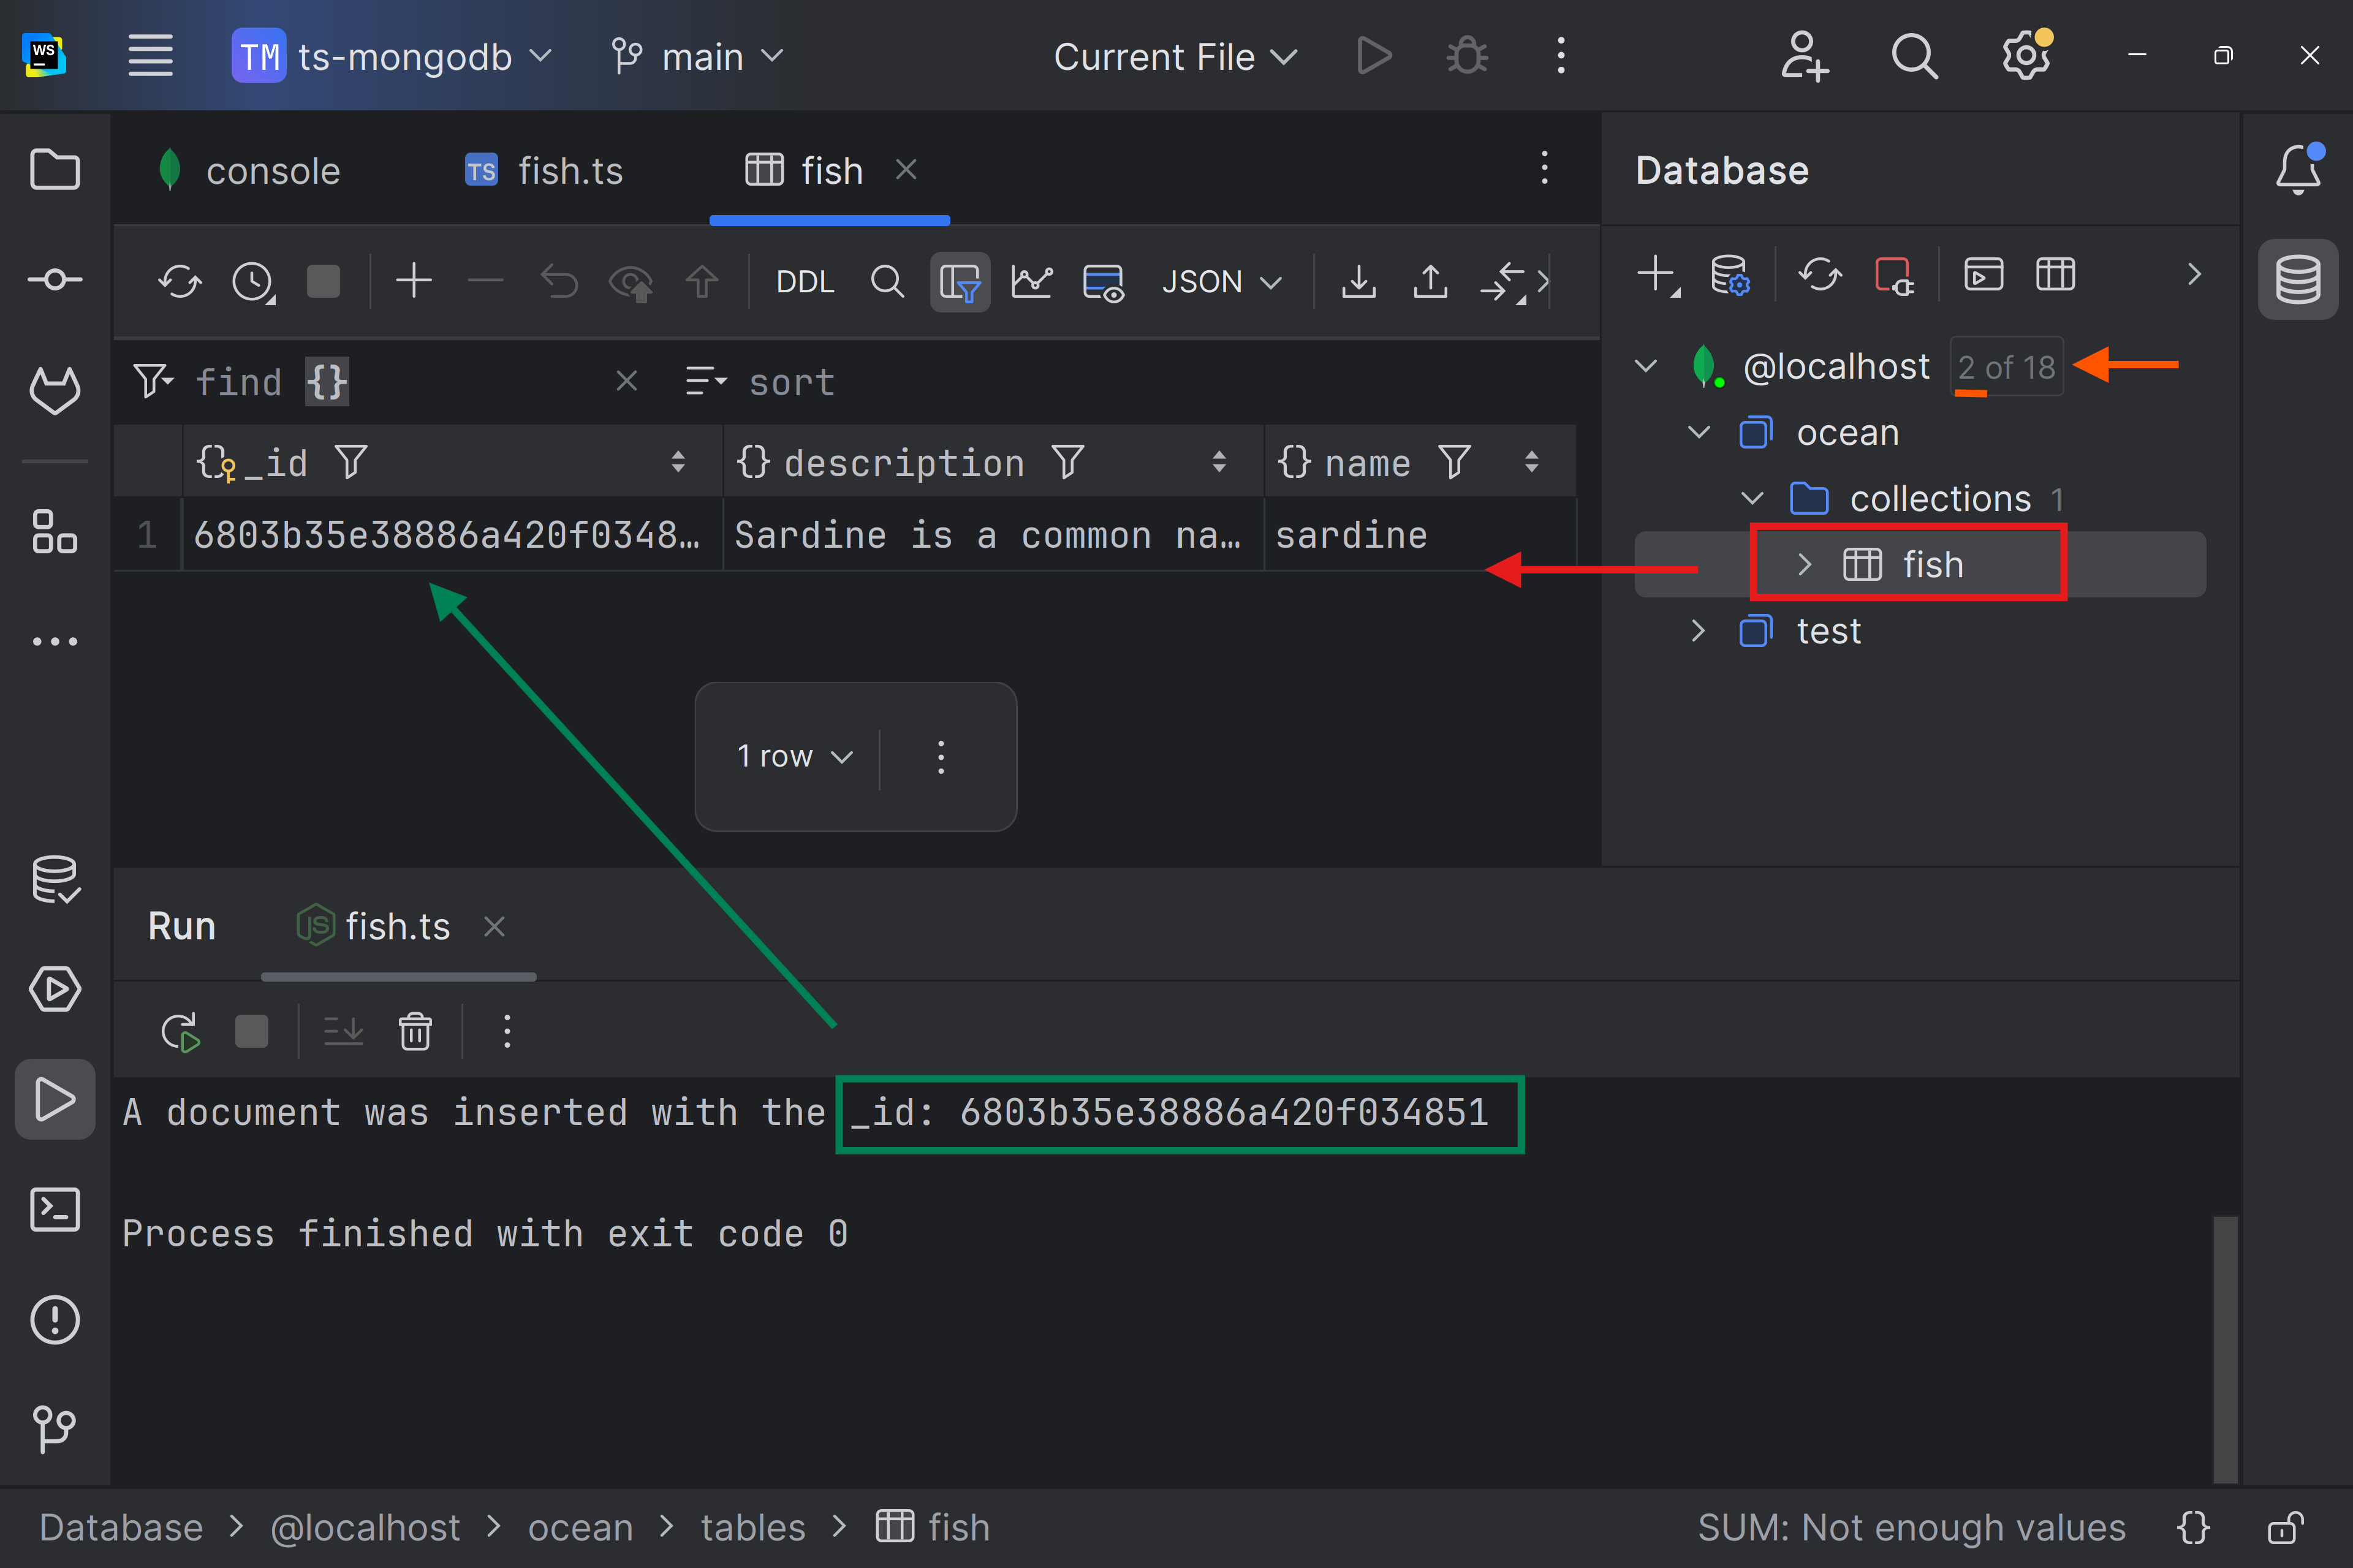
bun fish.tsL’script insereix el peix i mostra per consola la _id del document que acabes d’inserir.
Crea un nou “Data Source” per treballar amb la base de dades:

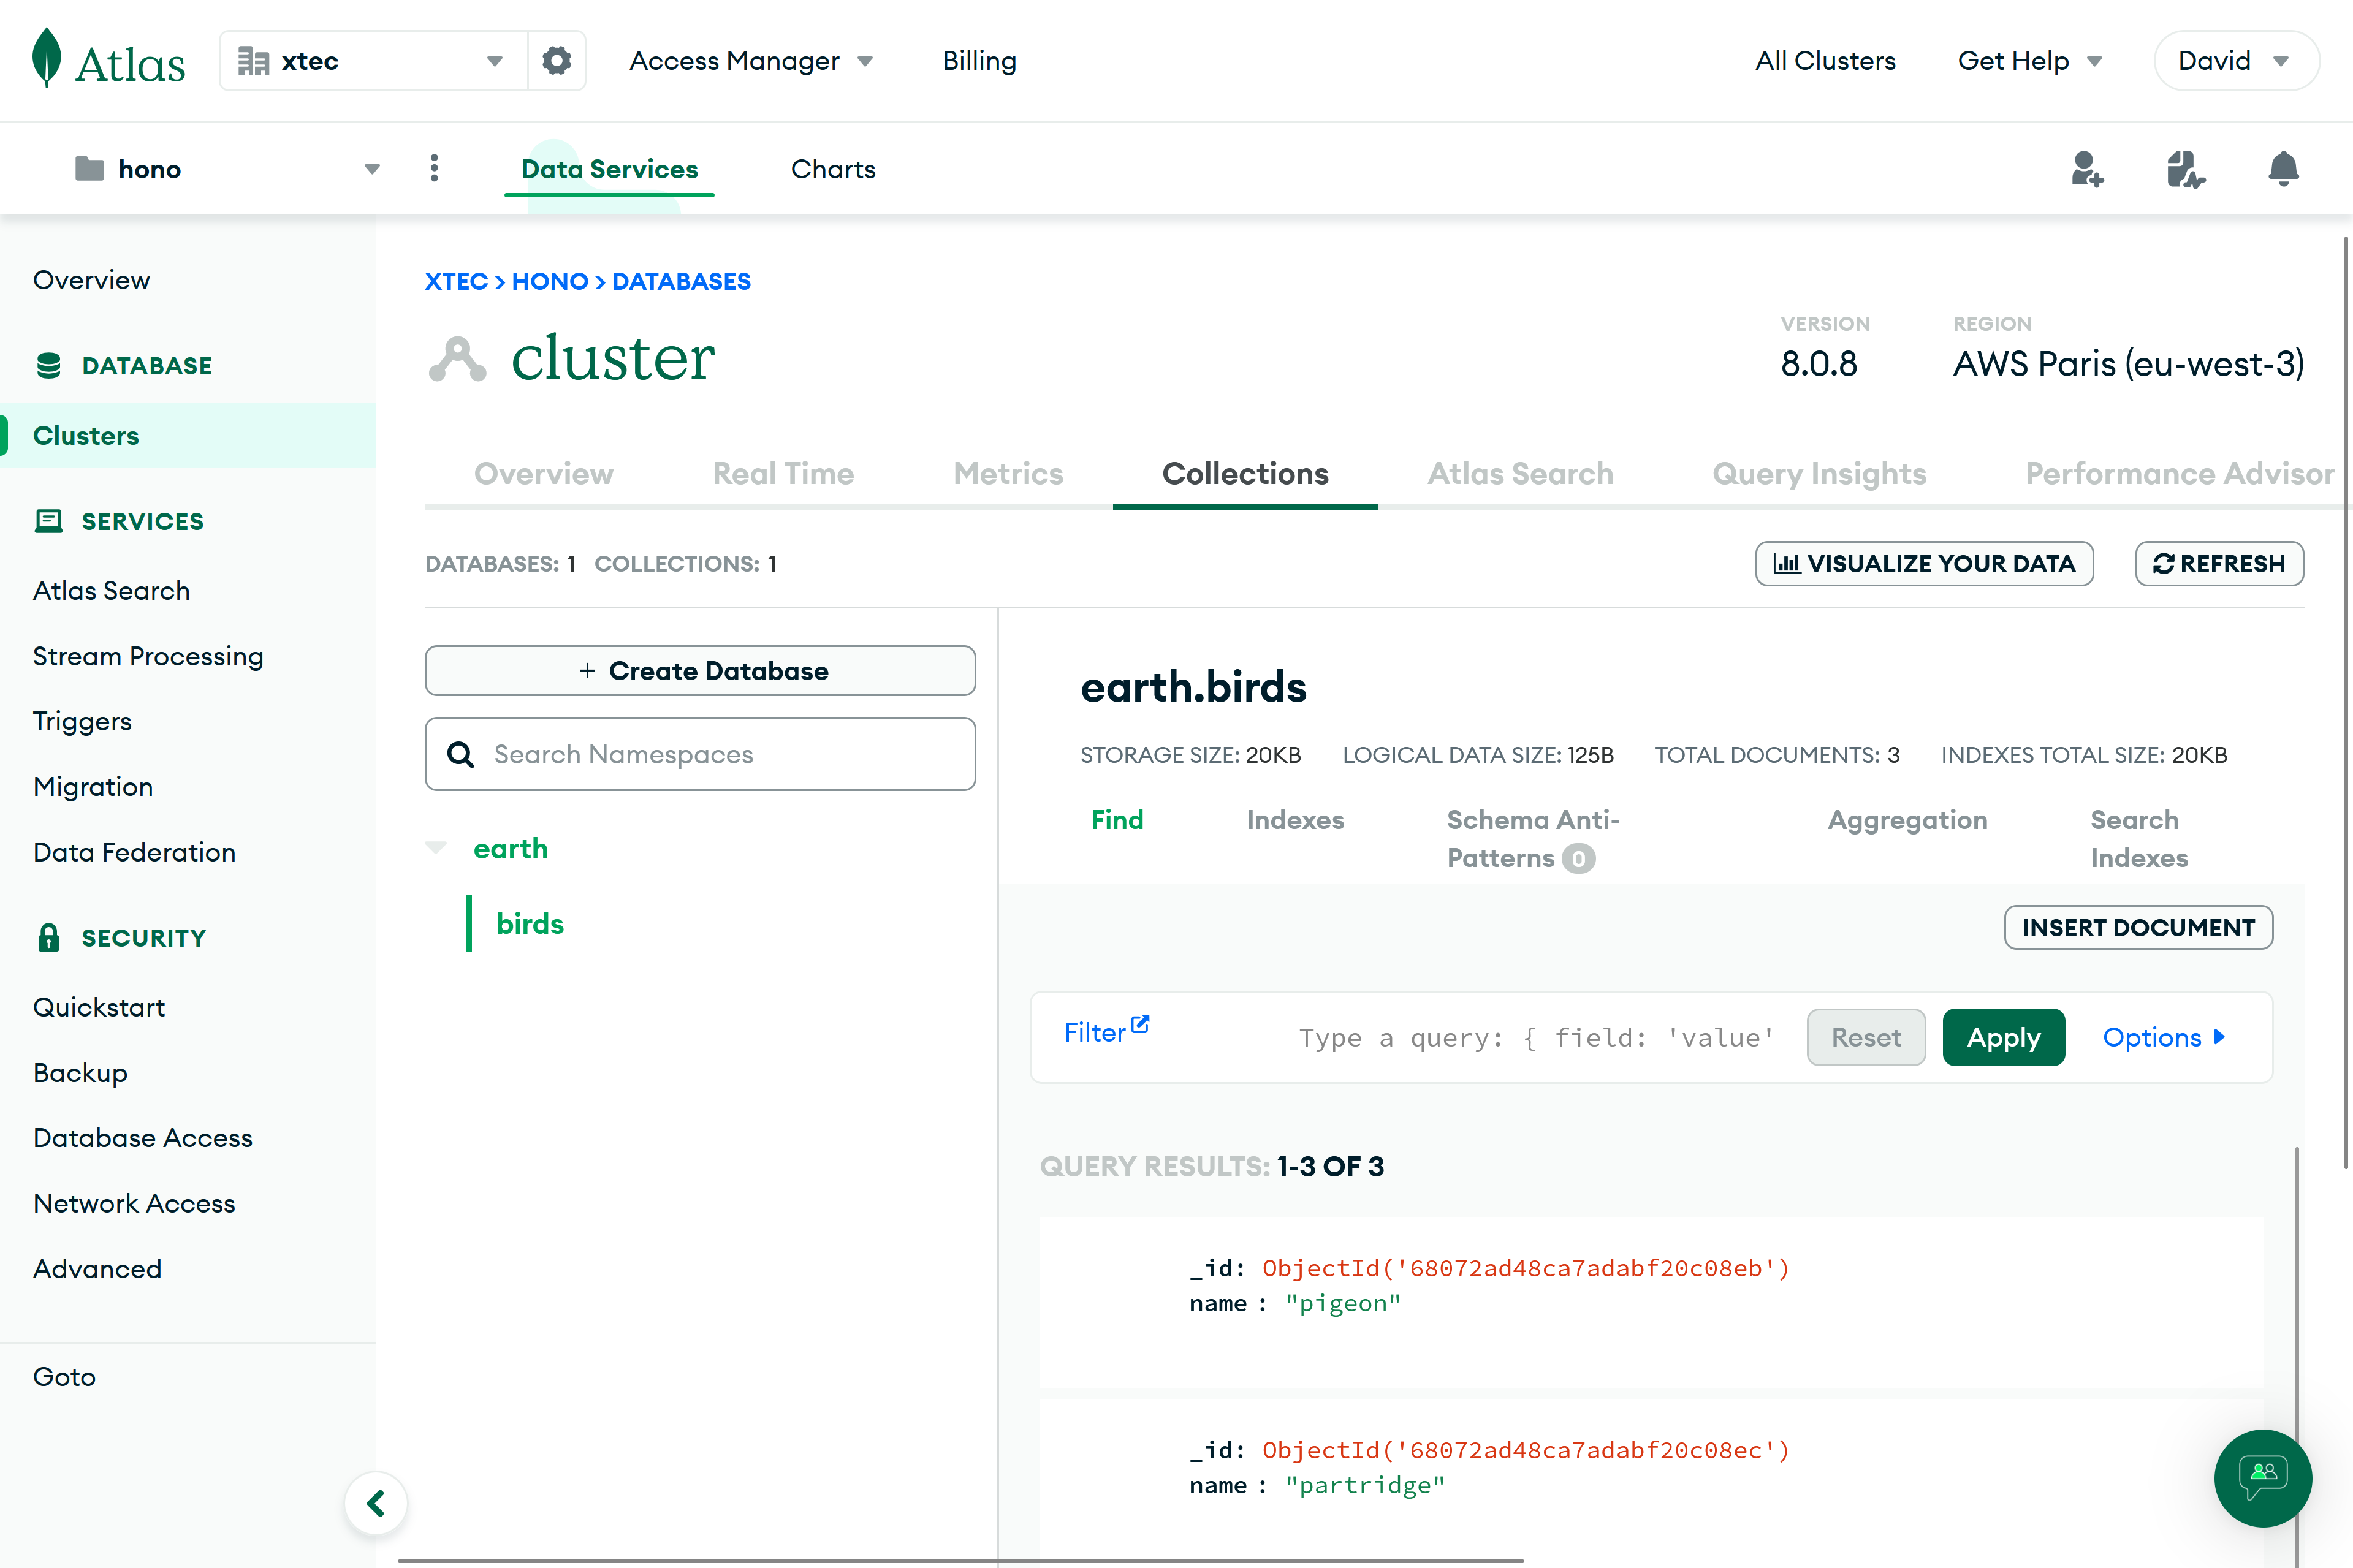
Pots veure que s’ha creat un document a la col·lecció fish:
Pots inserir diversos documents alhora utilitzant el mètode collection.insertMany():
// fish.ts
try
await
await sardine
await ,
])
} finally await
}Trobar Documents
PENDIENTE REVISAR
Pots consultar un sol document d’una col·lecció amb el mètode collection.findOne(). El mètode findOne() utilitza un document de consulta que proporcioneu per coincidir només amb el subconjunt dels documents de la col·lecció que coincideixen amb la consulta. Si no proporcioneu un document de consulta o si proporcioneu un document buit, MongoDB coincideix amb tots els documents de la col·lecció.
L’operació findOne() només retorna el primer document coincident
Exemple
El fragment següent troba un sol document de la col·lecció movies. Utilitza els paràmetres següents:
-
Un document de consultaque configura la consulta per retornar només pel·lícules amb el títol exactament del text
'The Room'. -
Un sort que organitza els documents coincidents en ordre descendent per puntuació, de manera que si la nostra consulta coincideix amb diversos documents, el document retornat serà el document amb la puntuació més alta.
-
Una projecció que exclou explícitament el camp
_iddels documents retornats i que inclou explícitament només els campstitleiimdbde l’objecte (i els seus camps incrustats).
title: string
year: number
released: Date
plot: string
type: "movie" | "series"
imdb: IMDB
}
rating: number
votes: number
id: number
}
try
// Specifying a Schema is always optional, but it enables type hinting on
// finds and inserts
,
sort: ,
projection: ,
}
);
movie
} finally await
}
}
console.dirMira tots els exemples que hi ha en aquest enllaç: Usage Examples
Atles
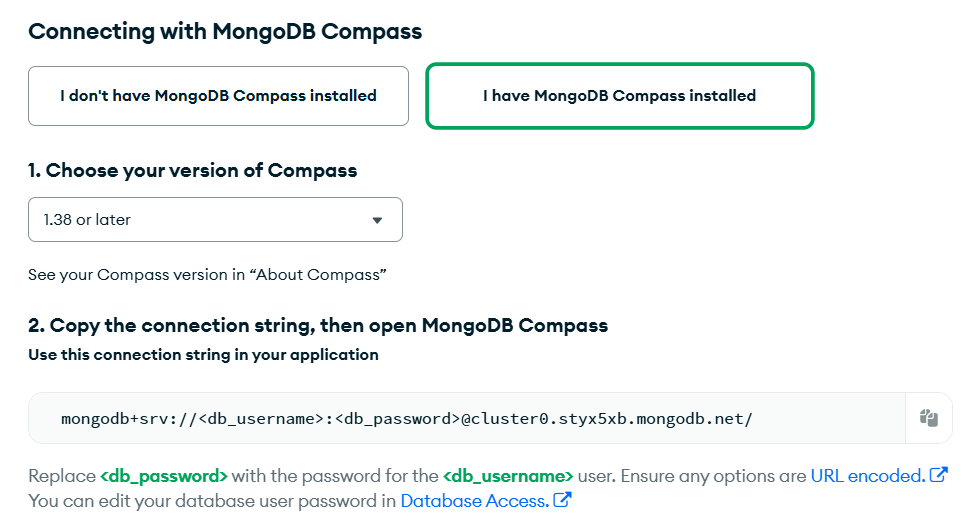
Ves a la pantalla “Overview” del cluster, i veus a l’enllaç on posa “Connect” per obtenir la URI de connexió.
Pots veure que per connectar-te a la base de dades remota l’URI de connexió conté una contrasenya, i aquesta contrasenya no pot ser al codi per motius de seguretat.
Afegeix la llibreria dotenv:
bun add dotenvCrea el fitxer .env al directori arrel del projecte, i afegeix la variable DB_CONN_STRING:
// .env
DB_CONN_STRING="mongodb+srv://<username>:<password>@cluster.2hr0xbm.mongodb.net"
Modifica el fitxer .gitignore perquè el fitxer .env no es guardi a Git.
.envCrea el script atlas.ts
El codi és el mateix que abans, excepte que ara la URI està en una variable d’entorn:
// atlas.ts
try
await
await name: "pigeon"
})
await ,
])
} finally await
}Creació cluster
A la web atles mongodb, t’ofereix un cluster gratuït, per poder conectar-hi.

La url la pots obtenir a la pestanya Connection , que et dona el link vàlid per ficar al ts.
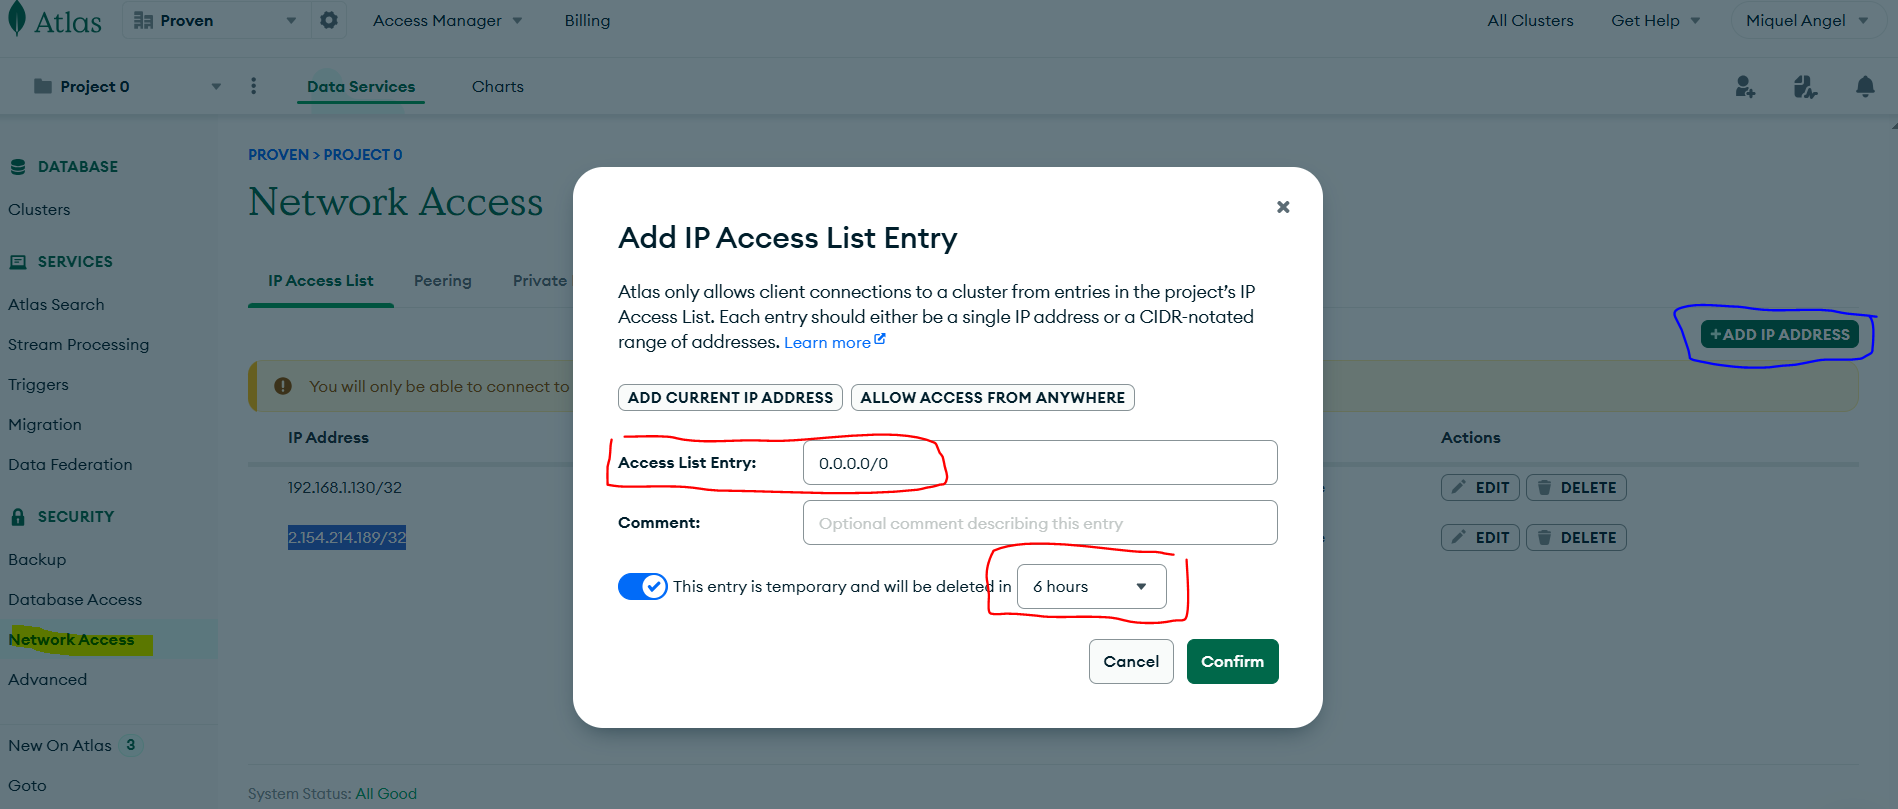
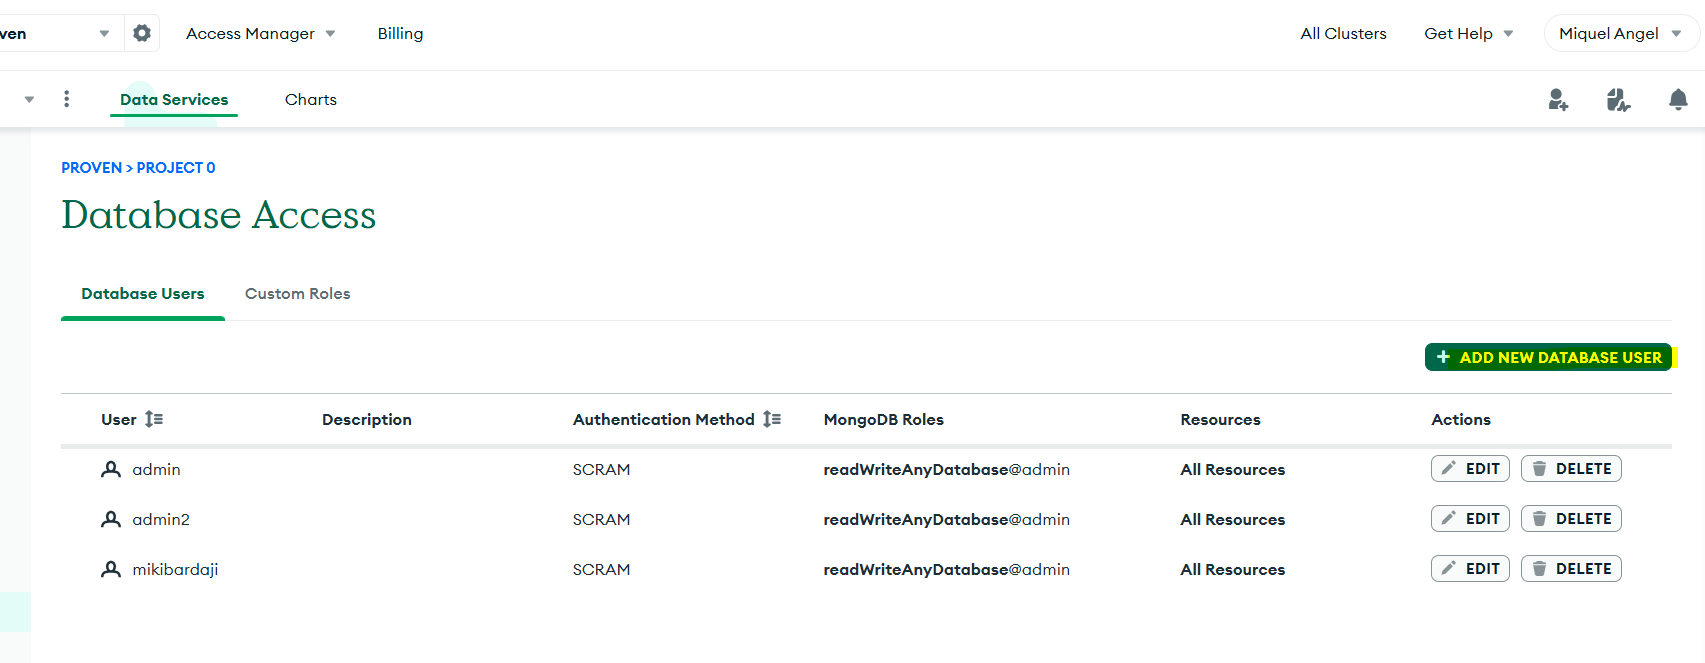
Per poder fer aquesta connexió, tindràs que crear un usuari amb permisos, per poder manipular la base de dades, o si sol es per consulta, dona-li els permisos pertinents:
I per poder realitzar les pertinents proves i perque no et doni problemes de conexió, habilita qualsevol connexió, temporalment, no es recomanable deixar aquest accés, obert sempre.