Row Level Security
Introduction
Supabase allows convenient and secure data access from the browser, as long as you enable Row Level Security.
RLS must always be enabled on any tables stored in an exposed schema. By default, this is the public schema.
RLS is enabled by default on tables created with the Table Editor in the dashboard.
If you create one in raw SQL or with the SQL editor, remember to enable RLS yourself:
<schema_name>.<table_name>
enable row level security;RLS can be combined with Auth for end-to-end user security from the browser to the database.
RLS is a Postgres primitive and can provide “defense in depth” to protect your data from malicious actors even when accessed through third-party tooling.
The auth.uid() function
Supabase provides several helper functions in the auth schema that make it easier to write RLS policies. The most common is auth.uid().
auth.uid() returns the id of the user making the request. This ID is extracted from the JSON Web Token (JWT) that the Supabase client sends with every request. If the request is not authenticated (i.e., no JWT is provided or it’s invalid), auth.uid() returns null.
How it works
When a user signs in, Supabase issues a JWT. This token contains a sub (subject) claim, which is the user’s unique ID in the auth.users table.
When the database receives a request:
- It verifies the JWT.
- The
auth.uid()function extracts thesubclaim from the JWT. - This value can then be used in your RLS policies to compare it against columns in your tables.
Example policy
If you have a profiles table where each row belongs to a user, you can use auth.uid() to ensure users can only see their own profile:
create policy "Users can see their own profile"
on profiles for select
using ( auth.uid = id );In this example, id is a column in the profiles table that stores the user’s ID (usually a foreign key to auth.users.id).
Impersonate user
Open SQL Editor and run the following query to see your user ID:
select auth.uidAs you can see, you are connected with the default Postgres/superuser role, so the result is null.
| uid |
|---|
| null |
Postgres/superuser role has admin privileges and will bypass Row Level Security (RLS) policies.
When testing RLS policies in the SQL Editor, you can impersonate a specific user to see how the database responds to their requests.
Using the Dashboard UI
- Open the SQL Editor in the Supabase Dashboard.
- Click on the Database role settings button at the top of the editor (it may show “Postgres”).
- Select a user from your
auth.userstable. - Run your queries.
auth.uid()will now return that user’s ID.
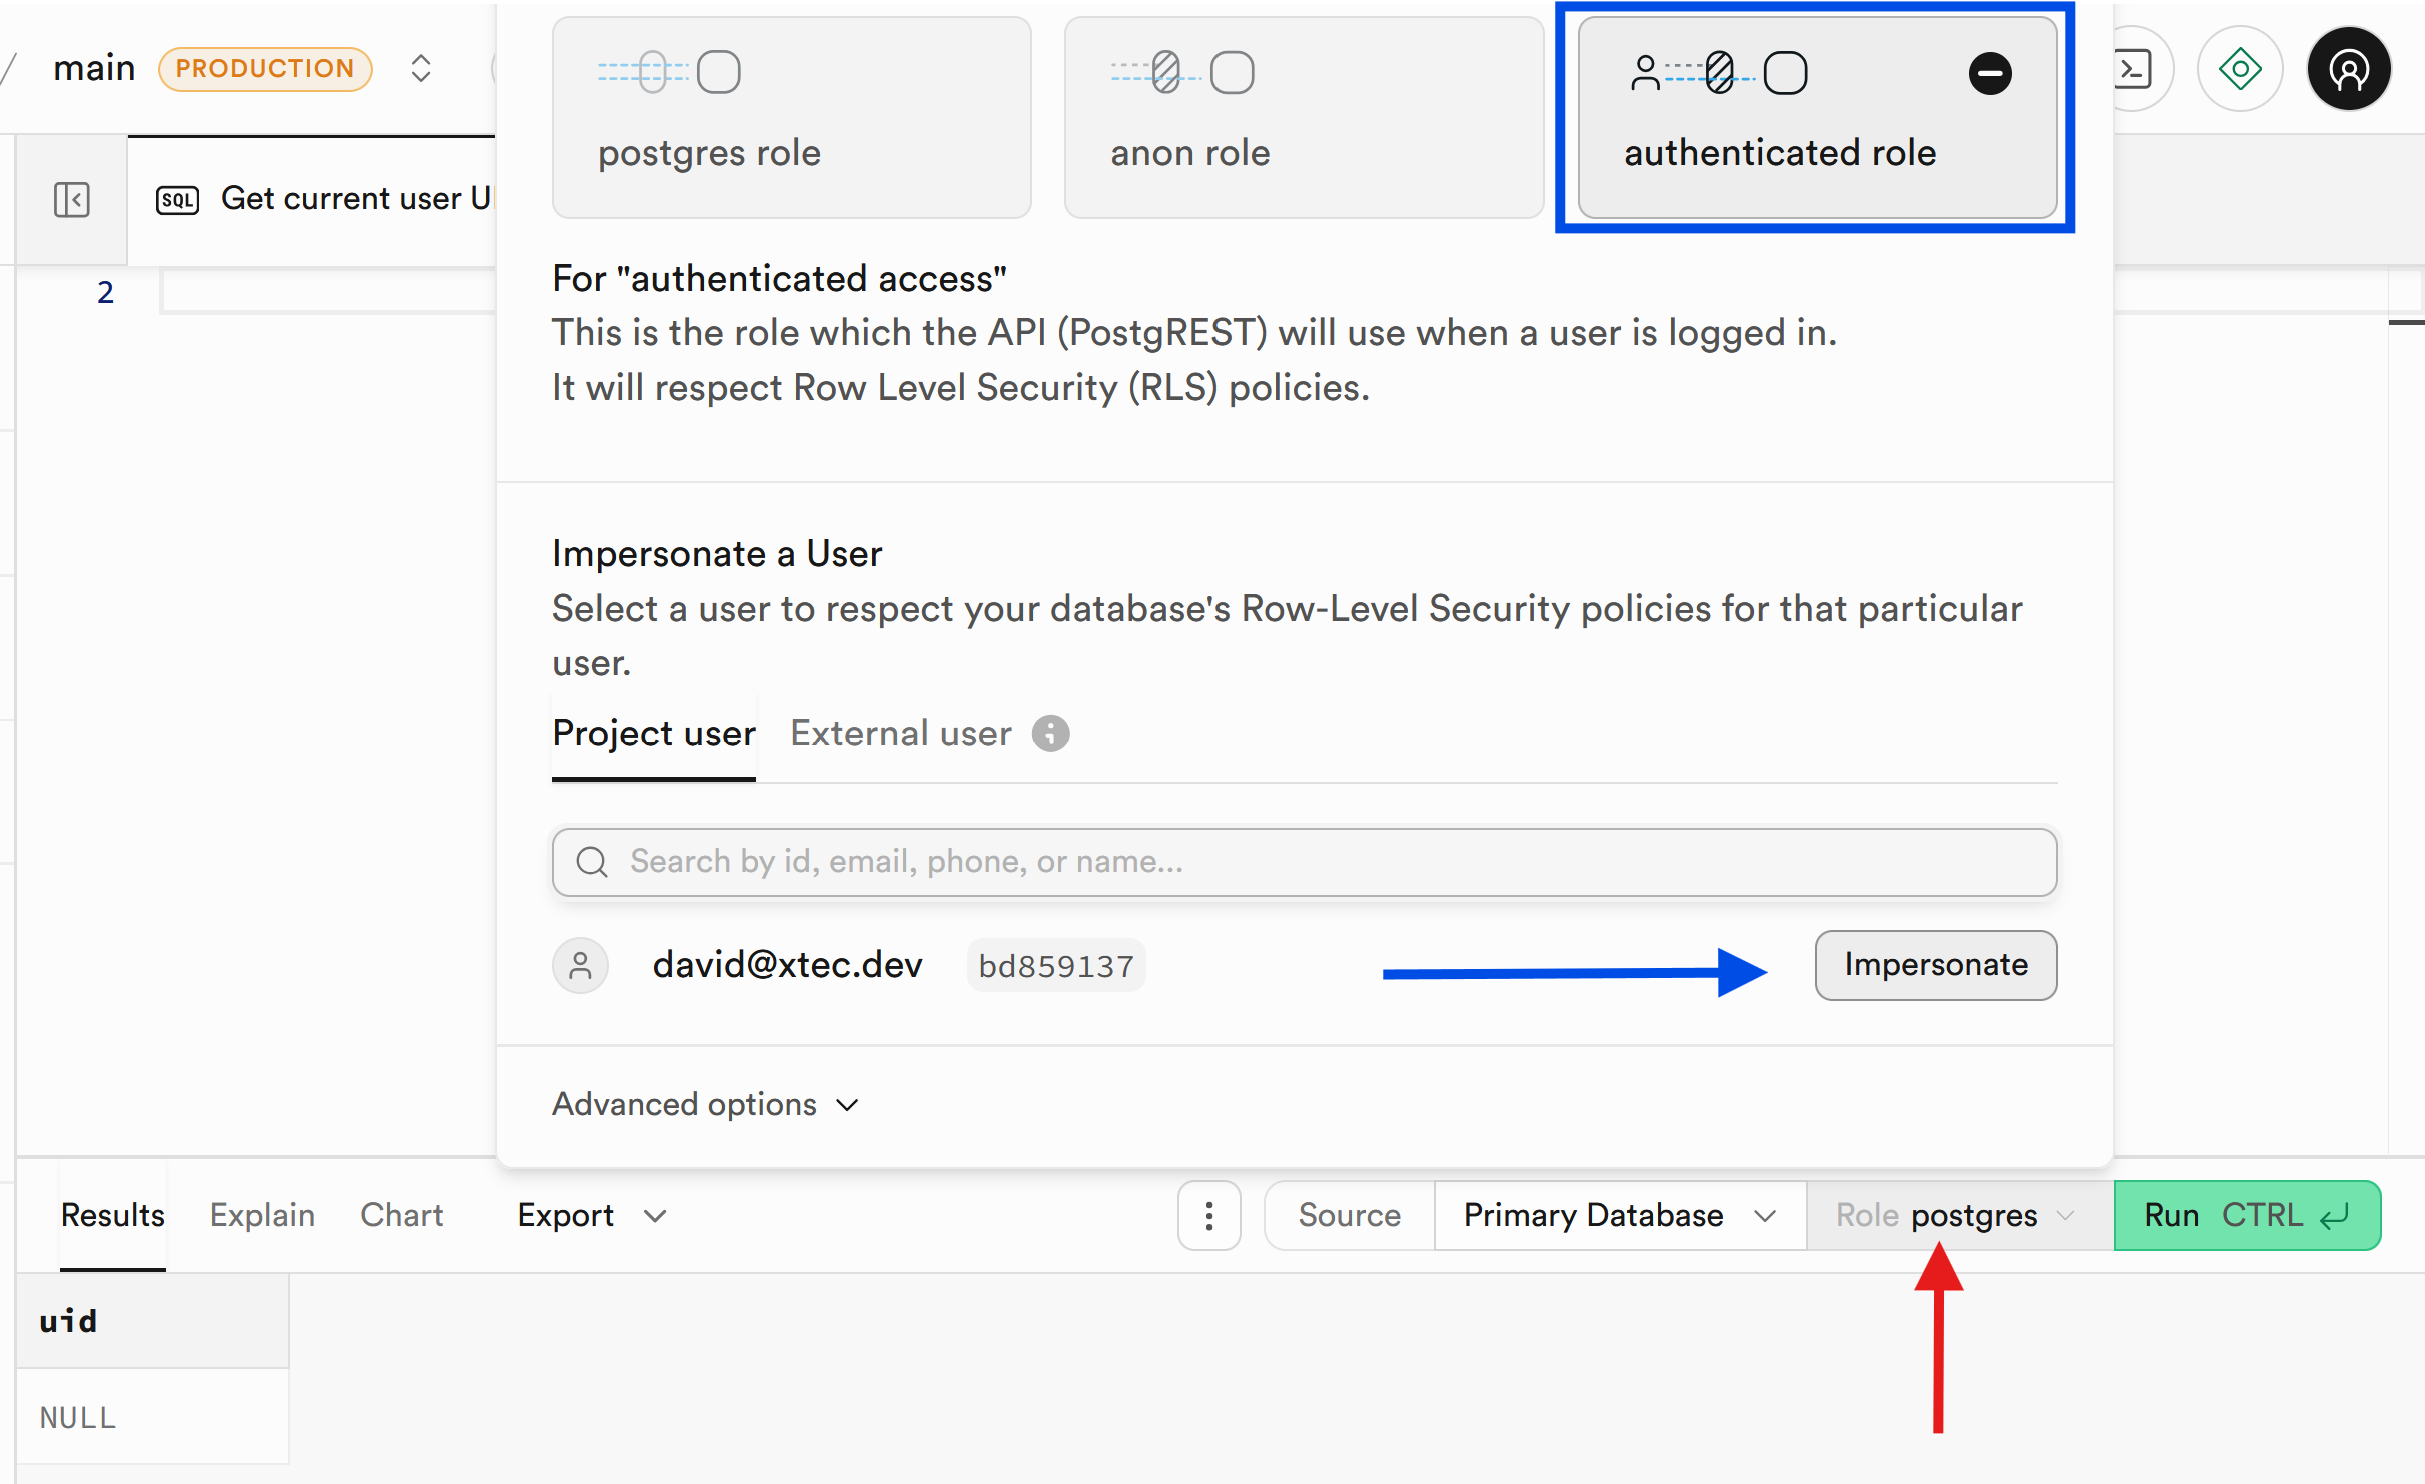
Now run again the auth.uid() query and you will see that it returns the ID of the user you selected.
select auth.uid| uid |
|---|
| bd859137-d5be-4b54-b057-52b645a204f0 |
Using SQL
You can also manually impersonate a user by setting the session role and JWT claims:
-- 1. Switch to the authenticated role
set local role authenticated;
-- 2. Set the user ID (UUID) for the session
set local "request.jwt.claims" = '{"sub": "bd859137-d5be-4b54-b057-52b645a204f0", "role": "authenticated"}';
-- 3. Run your queries
select auth.uid;TODO
Testing
You can test policies directly in the Supabase Dashboard by switching between different roles or impersonating a user.
-
Impersonation: In the Table Editor or SQL Editor, you can use the “impersonate user” feature to test policies as a specific, authenticated user.
-
Testing auth.uid(): Write queries in the SQL editor to verify that SELECT * FROM table only returns rows where the user_id matches the ID you are testing with.
-
Negative Testing: Ensure users cannot access or modify data they don’t own by running INSERT or UPDATE commands while authorized as a different user.